RECEIVING HALL AND GRAND STAIRCASE
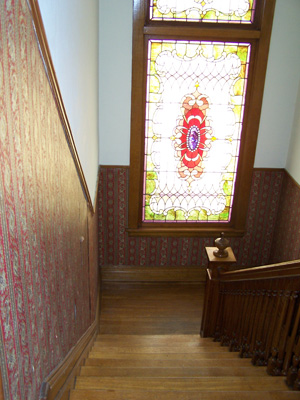
The receiving hall in one of our favorite parts of the house. It features a built-in bench, beveled glass window on the front and a grand staircase with a 10 foot high stained glass window at the landing. Once we saw this we knew we were buying the house.
The renovation in this room included:
- Wallpaper replacement
- New paint
- Ceiling and crown moulding
- Chair moulding
- Picture moulding
- 2 new chandelier Light fixtures
- Floor refinishing
Renovation of this room was cosmetic. When we purchased the house, this room was very dark. Mainly because of the dark floor, poor lighting and dirty wallpaper. The wallpaper in the staircase was held up with a clear tape.
Here are some of the before and after photos.
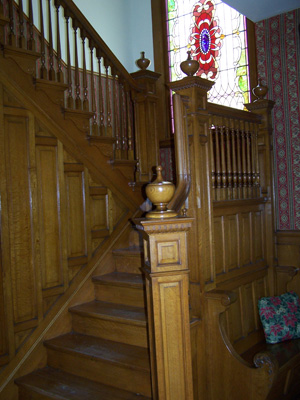
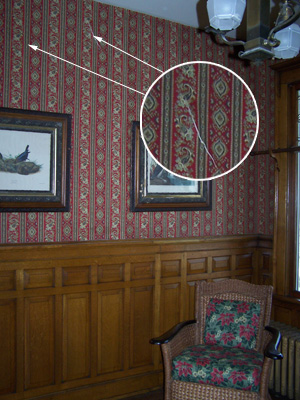
These picture were taken during the first tour of the house (before the purchase). As you can see, the wallpaper was pretty rough and the picture moulding was missing. Luckily, we were able to find almost all of the picture mouldings in the attic. By the length and species of wood, it was pretty easy to match to each room, both upstairs and downstairs. We knew exactly where it was located, because after removing the wallpaper, the 2 different colors of paint on the wall were clearly visible. We liked the look of the original red striped wallpaper and stayed with that theme. We did a very simple 3" Oak crown since the majority of the wall was covered by oak wainscoting, door frames, busy wallpaper and a picture moulding.
This room is not completely finished, as we are planning to clean (to see how it's done visit our TIPS section) and varnish the woodwork to give it a nice and clean look.
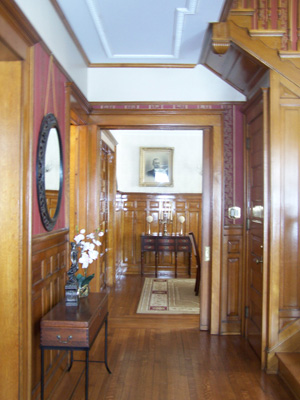
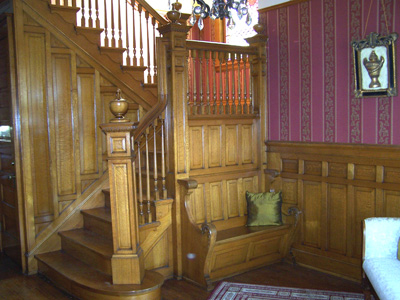
After
WALLPAPER : Ok, if anybody thinks removing VERY old wallpaper is easy... well think again. It's a dirty, wet and sticky job. The old paper smelled awful. None of the wallpaper removers worked, including the steamer, chemicals, gels and the magical mix of fabric softener, which just gave it a nice smell and that's about it. Where it was peeling off - not a problem, but where the paper was stuck, it was stuck there for good. The brown, paper thin backing did not come off with scraping. I had to pour water, wait and then rub with a hard bristle brush. It was like that in all the rooms where the wallpaper was stuck on the walls. I hated every minute of it and I am just glad it's all done. Hopefully, the wallpaper that we used won't be that hard to take down years down the road. Marlena
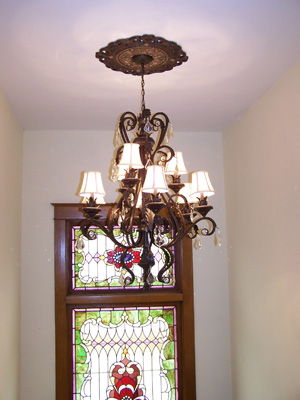
CHANDELIER IN THE MAIN STAIRCASE: There weren't too many projects on the house that brought me to tears. This was one of them. On the picture above you do not see a light and below you do. There wasn't one there when we moved in. This spot was meant to have a large light fixture, so we went online and found the perfect one. Burt built a temporary wood scaffolding that got us half way to the ceiling. We set up a step ladder on the top of the scaffolding to get us the rest of the way. Please note, that I am deathly afraid of heights. Well, the job had to be done and there was only the two of us to do it. I was the one that had to climb the ladder and hold the 75+ pound fixture, while Burt attached a safety cable and the chain in the box. Easier said than done. I have never been this scared in my life. The picture does not do the justice of how high it is to the ceiling. One thing I am sure of - when the light needs a new light bulb, it will not be me changing it! Marlena
"We picked this light because the curves in the light match the curves in the stain glass window. The first obstacle with this whole project was in my haste to get it hung, I accidentally cut the main electrical wire too close to the fixture. We couldn't splice in a section, so we had to re-wire the whole chandelier from the top to the bottom, which meant complete dismantlement .........adding lamp service technician to my title. The second problem was the ability to run a wire from the switch on the second floor to the switch on the first floor to complete a 3-way switch. The only way to do this was to run a cable down the interior wall from the attic to the basement and back up to the switch. Problem was there was a 8x8 beam that they used to support the landing. Using a drill bit on a 14 foot long extension I was able to drill a 1/2" wide hole for the wire. It took a couple days and I burned out my first cordless drill in the process." Burt

Christmas 2009
BACK TO INTERIOR REMODELING


