GABLE REPLACEMENT
The gable project was very challenging to say the least. It was in a very rough shape and accessibility was not easy. The scaffolding was a part of our home's architecture for a very long time. The gable top is about 40 feet off the ground. The wood shake, columns and windows had to be replaced. We also decided to add some onlays and dress it up with molding to coordinate with our future Painted Lady scheme.
Here are the steps we had to take to make it happen.
BEFORE

The lower three rows of shake were missing and were replaced with metal. Some single shakes were missing around the windows. The column tops and columns were in a terrible shape. The windows were drafty to say the least. Please note the diamond pattern on the upper window sash. The exact pattern was made by Renewal by Andersen for our new composite replacements.
The shake was shaped in a cove pattern. We wanted to use cedar shake in the same pattern to stay true to the feel of the current gable.
DURING
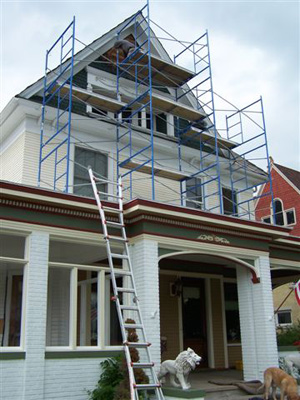
Now, let's see what took to get up there.
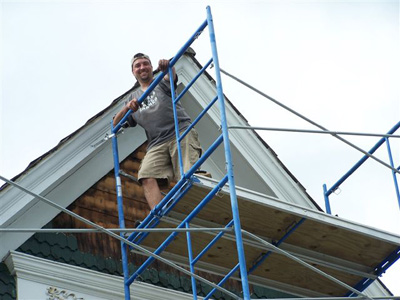
We were into the first week of the gable renovation. Burt is still smiling. By the 3rd month, he was not smiling that much anymore.
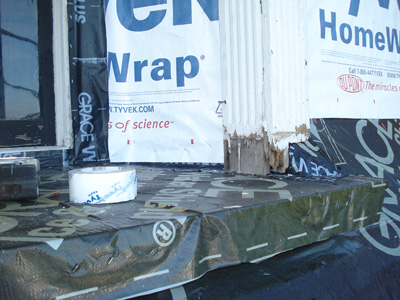
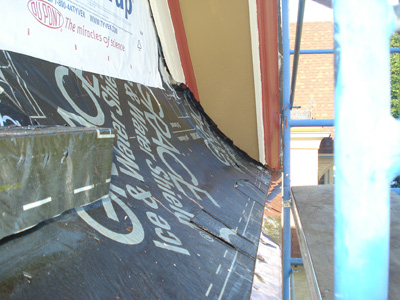
Let's call it rot. Start from scratch on the outer columns. Everything was wrapped in Tyvek. The slope and the window sill was covered in ice and water. Everything had to be water tight.
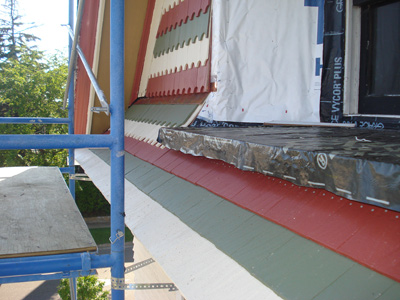
Copper was installed on the "break" of the gable, the drip edge and the top of the mantel. The small tin roof where the columns rested was removed and replaced with a new rubber membrane.
Time for the shake. Seems like a pretty easy task. Well, somebody had to make it and then paint it.
Due to the budget we purchased bundles of regular cedar shake and had routed the cove ourselves. While Burt was cutting the shake to size, I was painting. Sometimes Burt reminds me of Mike Holmes (if you ever watch the TV show, you will know what I mean). Apparently the shake had to be primed on both sides??? (just a tip, remember you need to use oil based primer for any cedar). That was a dirty job..
After the primer there were two coats of paint in 3 different colors.
The gable is not my favorite project (and we have three more to go!!).
"There are many things I don't like to do and painting is one of them. Lets just say from the second tier of the scaffolding up....all the trim, touch-up and mantel re-painting I had to do. I used a artist brush. 2 coats of each color. I found time at 6:00 in the morning while having my coffee right before I had to go to work. My wife observed from the ground." Burt
This is how the conversation went:
Marlena: Oh, I think it looks great.
Burt: I think it's too busy. Let's try to tone it down a bit.
Marlena: But honey, you just made me paint all that shake.
Burt: Do you think we should repaint the gable one color or maybe install a peak with an onlay.
Marlena: Onlay will be perfect. (At that point I would agree to anything but repainting all the shake).
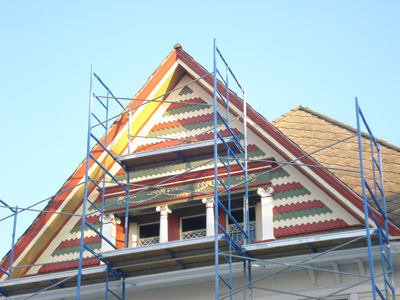
And that's how the peak extension made it on the gable. Later I will learn that I need to hand paint a huge onlay in 4 different colors and don't forget the gold accents!
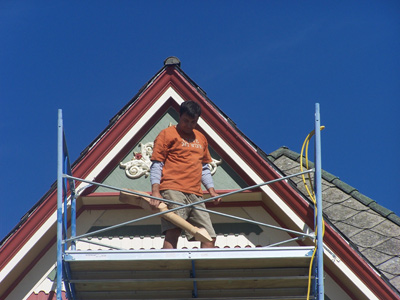
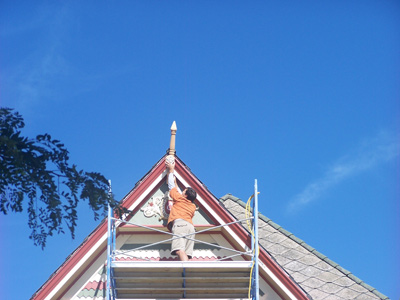
Honey, I know you are 40 feet off the ground, but can you hold it just a bit higher?
Here is Burt, the onlay and our latest idea (we can't seem to stop improving on this project).
"There was a bees nest in the top end cap of the roof. I found that out while cutting into it from a step ladder.
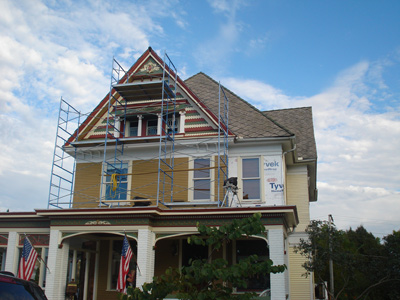
All that is needed now is the spire, paint the band boards, finish the siding, cast onlays, re-do the roof, landscaping.......
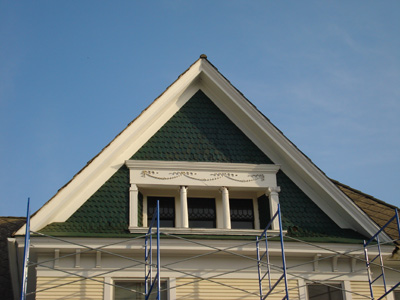
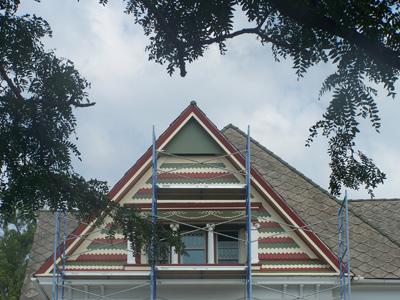
AFTER
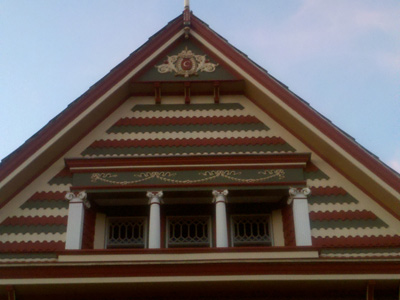

It's still growing on us. We added three brackets that are identical to the brackets that are under the soffit on the second floor. The center columns were scraped, repaired and painted. The column tops were casted. Check our TIPS section to see the casting process.
New custom windows complete the dormer. The picture on the right shows we have started adding the large swag onlays below the soffit on the upper. On the lower roof we actually have removed all the small gold swag onlays (which are barely visible) and re-casting them to be creme to give more of a contrast.